Now we are ready to open OneTwo3DO and bring in the data.
PREPARATION
After getting all the points around the infield section [be
sure to save often, especially on older/slower systems a crash
is not nice to recover from].
|
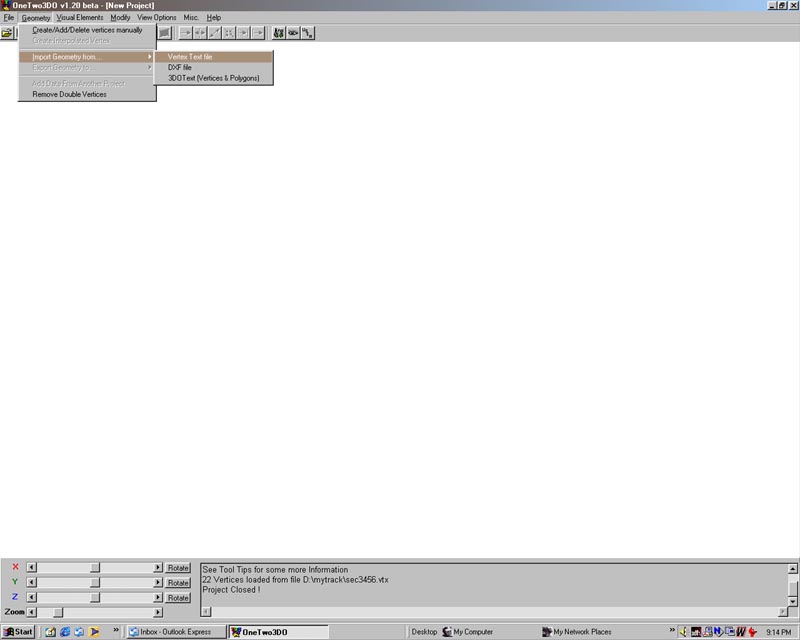
1. OK, open up OneTwo3Do. Be sure to set the options for point size (here I set it to 10). And make the axis big enough to see (I used a setting of 50), because its easy to not see the points or axis. Also the default in OneTwo3DO is to not show the axis so turn that on before importing. If you can't see the option I have selected remember to click the image for a larger view. Required Vertex- file sec3456.vtx (Click on any image to see a larger version) |
 |
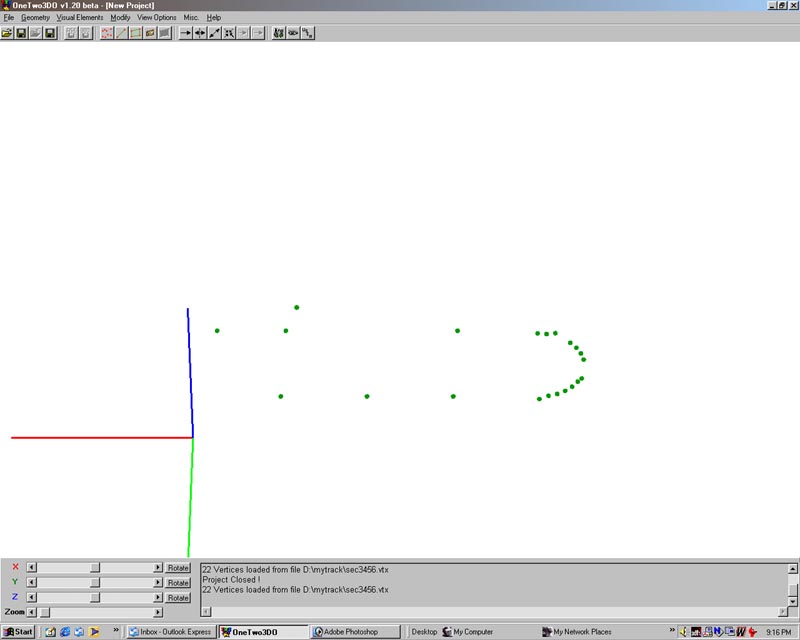
| 2. Now we zoom in to the loaded points. As you can see I need to do some adjustment to make the section uniform. |
 |
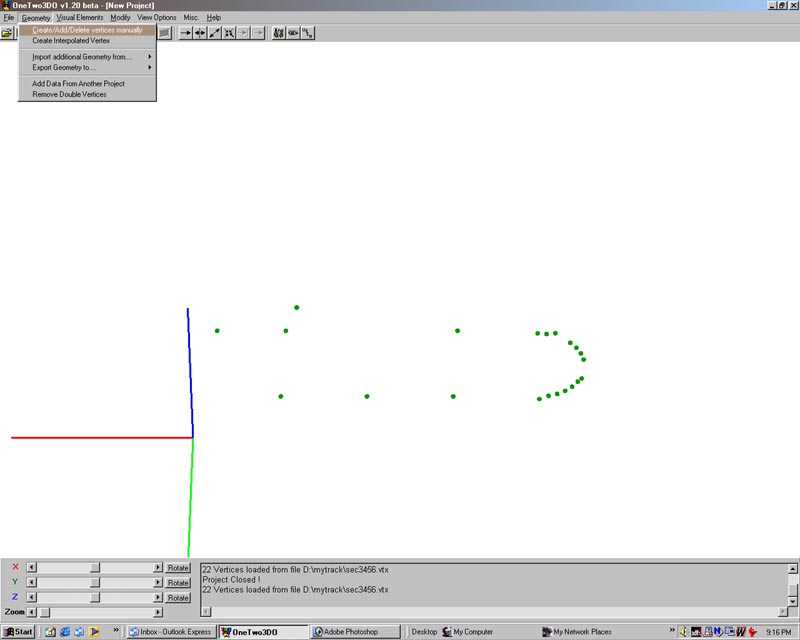
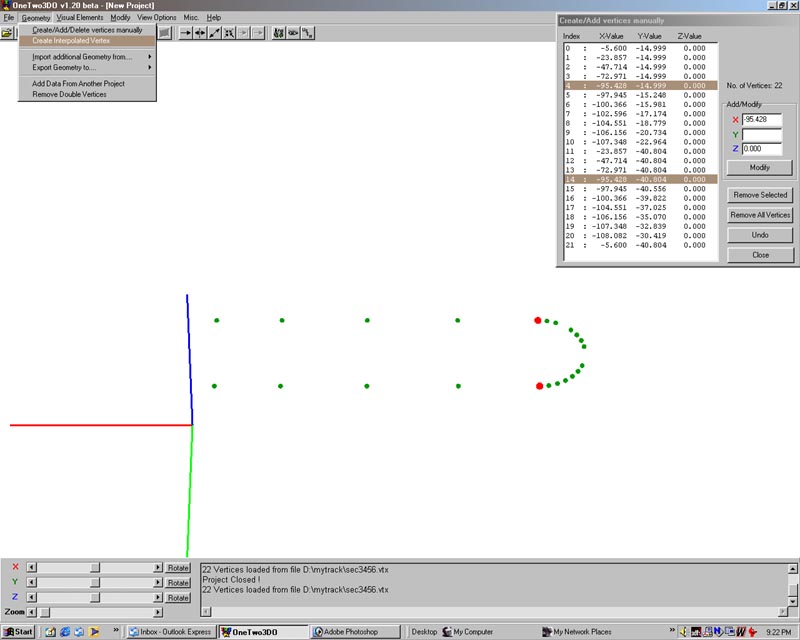
| 3. OK, to correct my errors I select-Geometry-Create/Add/Delete vertices manually. |
 |
| 4. Now you will get a pop-up listing all the vertices you entered into the mytrack.vtx file.I first go through all the points so I know what number they are. And then take note of my first node. You will notice that the orientation is opposite that of 3doEd [leave it, it will go into your GPL track just fine the way it is]. |
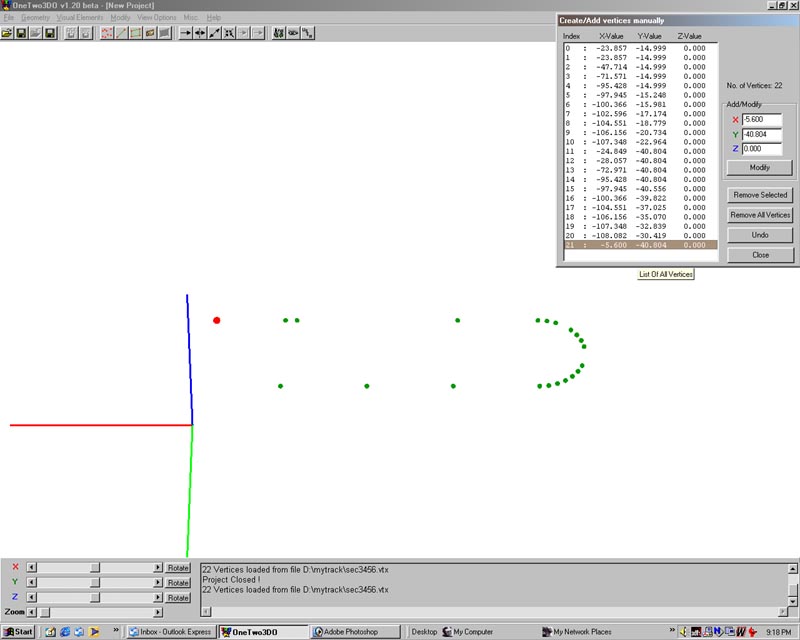 |
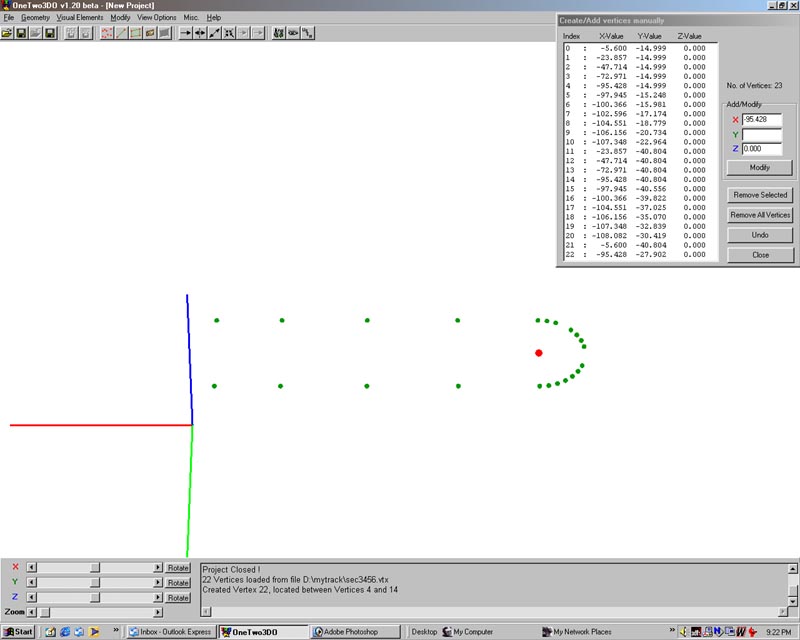
| 5. I have now cleaned up all my points by making all z values 0.0. What you will be looking for with infield/outfield section is the "lowest point" to attach to the existing track. By looking at the vertices I have I have balanced the points, this is not necessary but I have found that textures are easier to apply to uniform polygons. A really great new feature of OneTwo3DO is "interpolated vertices". The first point I add is one which I will attach the curve point to. |
 |
| 6. Now you can see the new point created. Now I want to adjust a few points on the curve and fill in the gaps. [I must have skipped two points. You could go back into Ed, or do it here]. |
 |
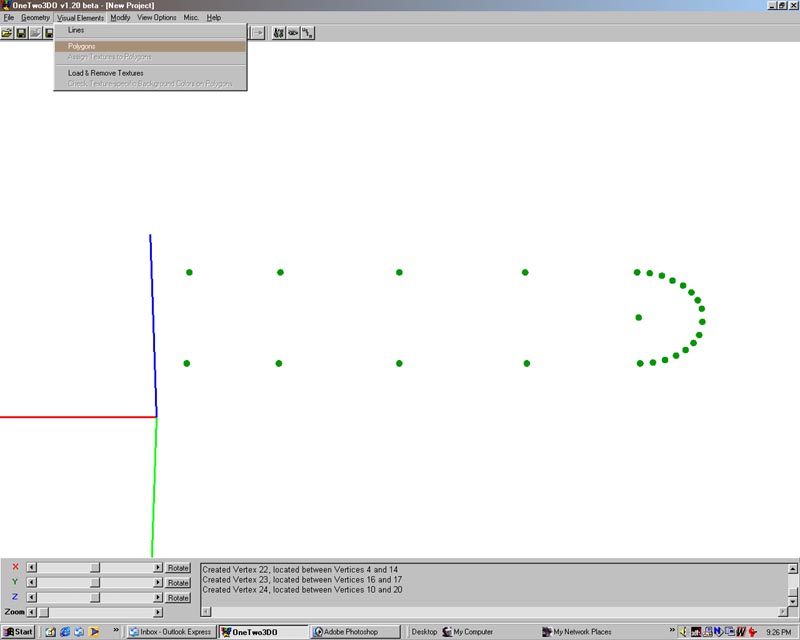
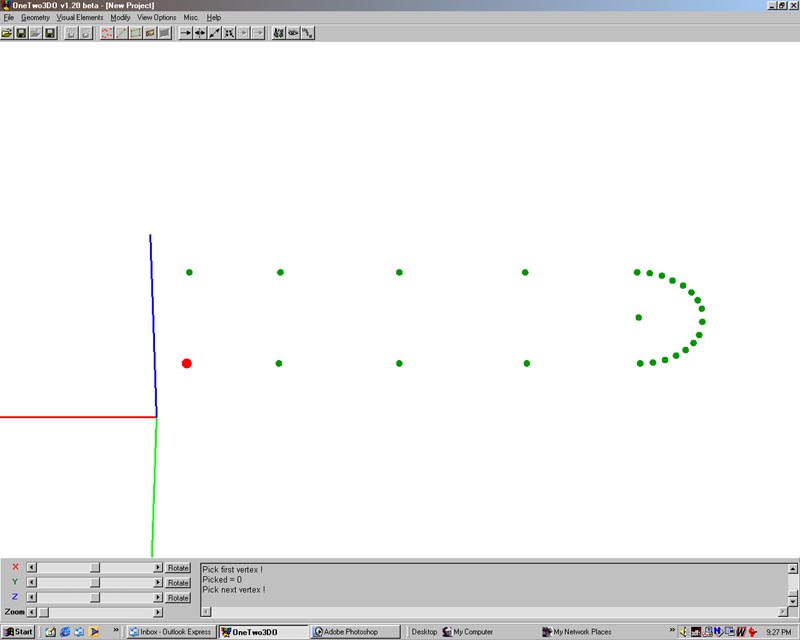
| 7. Now I have a complete set of points upon which to build the polygons. Notice the long gray window at the bottom it always tells you what you have just done. You can scroll back through this information to the beginning of a session if need be. |
 |
| 8. Ok, now we are going to build the polygons to fill this infield section. |
 |
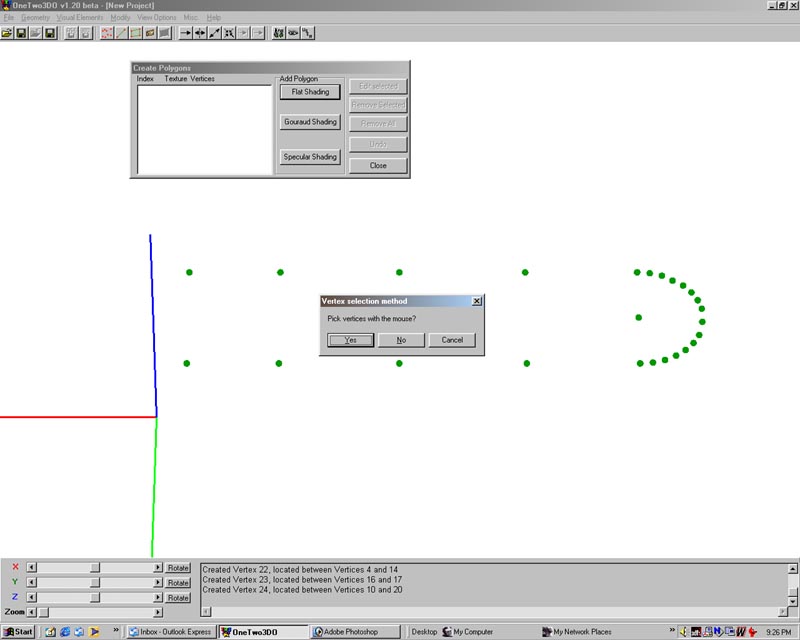
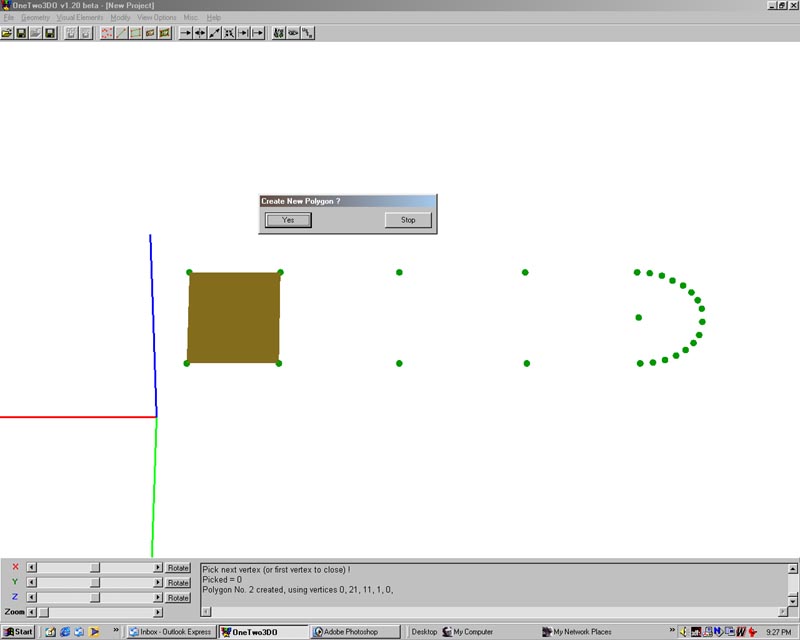
| 9. Select the flat shading option and I let the program select random colors for the polygon. Once I have finished a project I do go back and replace all the various polygon colors with the median color of the texture I am using for that section. What this does is to make things more visible in GPL. One place you might really notice this is 3do's with invisible parts. You can see a line on these, this is an afterimage of the base polygon color and can be fixed by what I have just described. You want to pick points for the polygon with the mouse so click yes. |
 |
| 10. All polygons are two sided. So the order which you pick points is important. If you go in a clockwise direction you pick the side facing you, a anti-clockwise direction pick points for a back facing polygon. If only one side will show up in GPL it really cuts down on resources to have only one face. |
 |
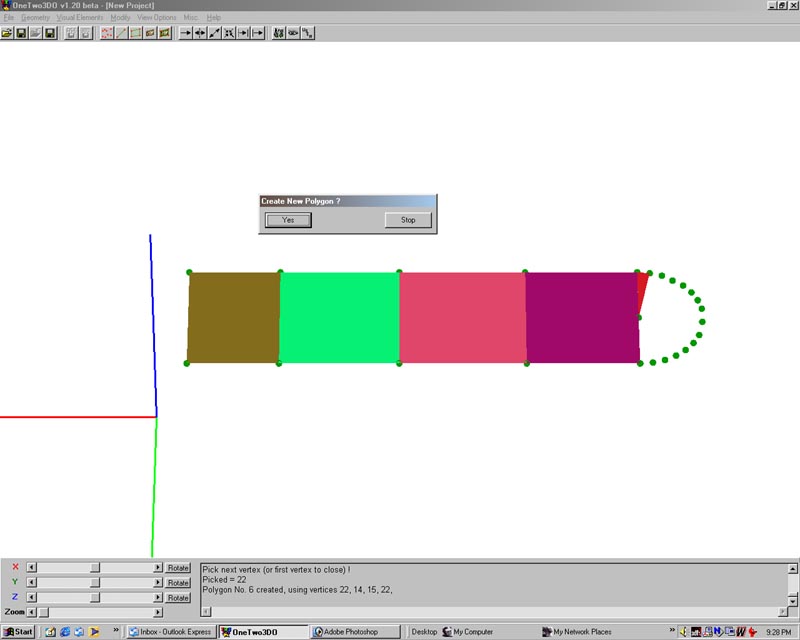
| 11. After each new polygon is created you will be asked if you want to create another. Say yes until you have all the polygons created for the section. |
 |
| 12. Now our section is really beginning to take shape.I only connected four points on this last section, the point in the middle is for the curve. |
 |
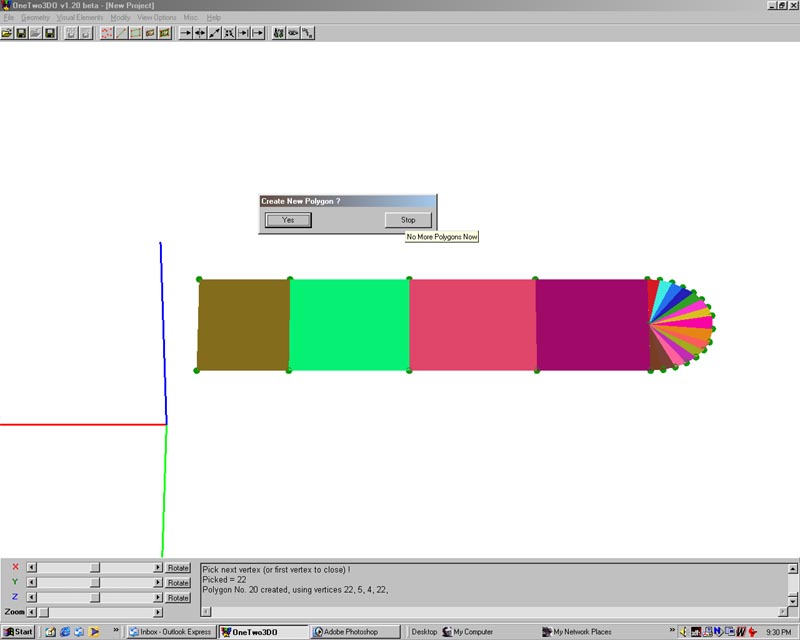
| 13. It depends on the individual. But I prefer to not change orientation while building polygons. That way I can usually do all of them with the correct face. |
 |
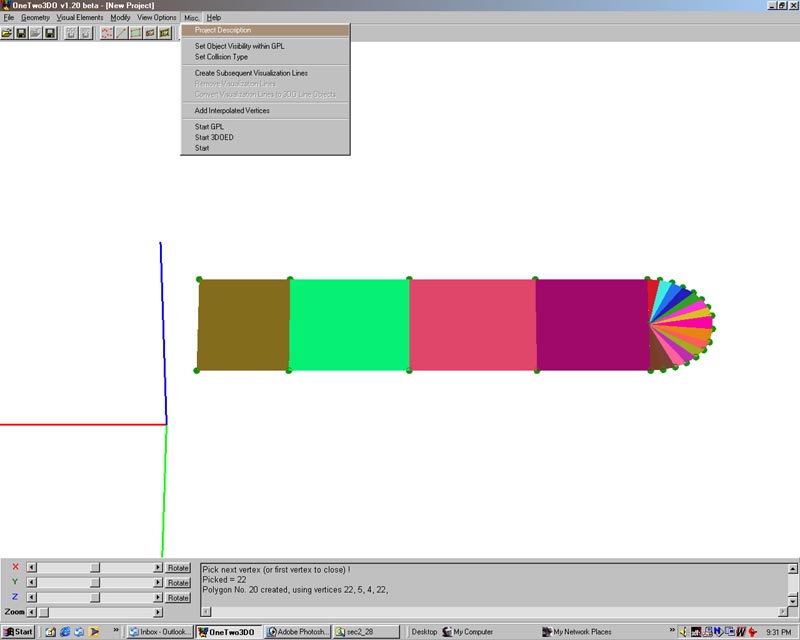
| 14. OK, job done so select to stop picking points to build another polygon. |
 |
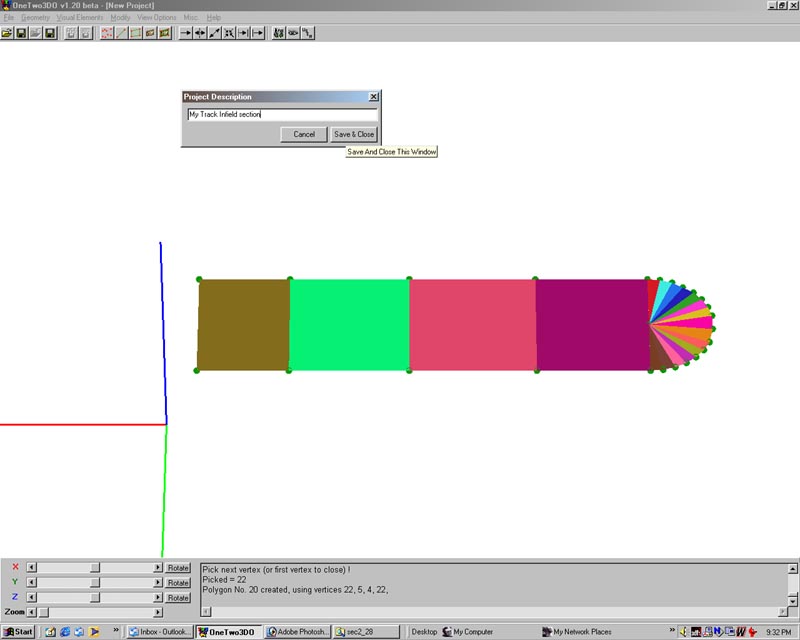
| 15. At this point I usually enter the project description. This is handy especially if you want to print out the information in the file at a later time. |
 |
| 16. OK project named. |
 |
| 17. If you don't look close you will not see the difference in this screen and the last. |
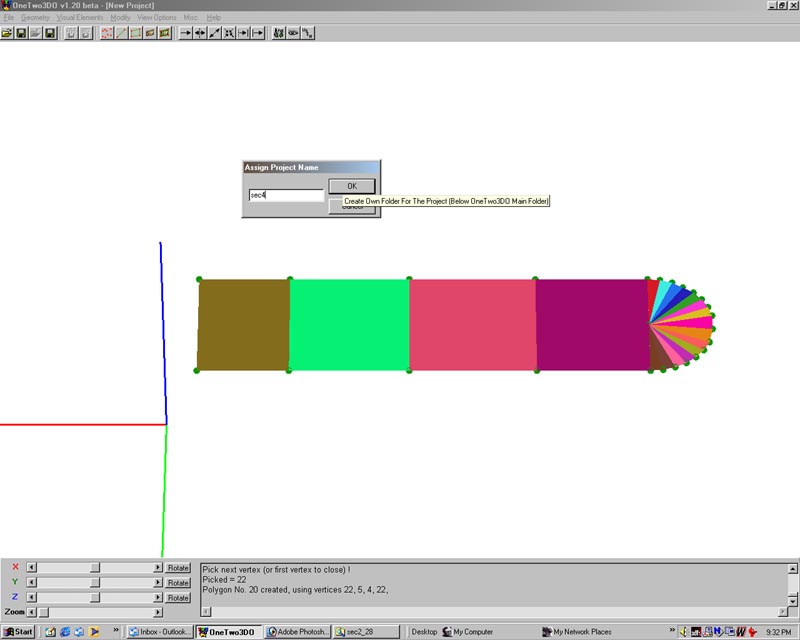 |
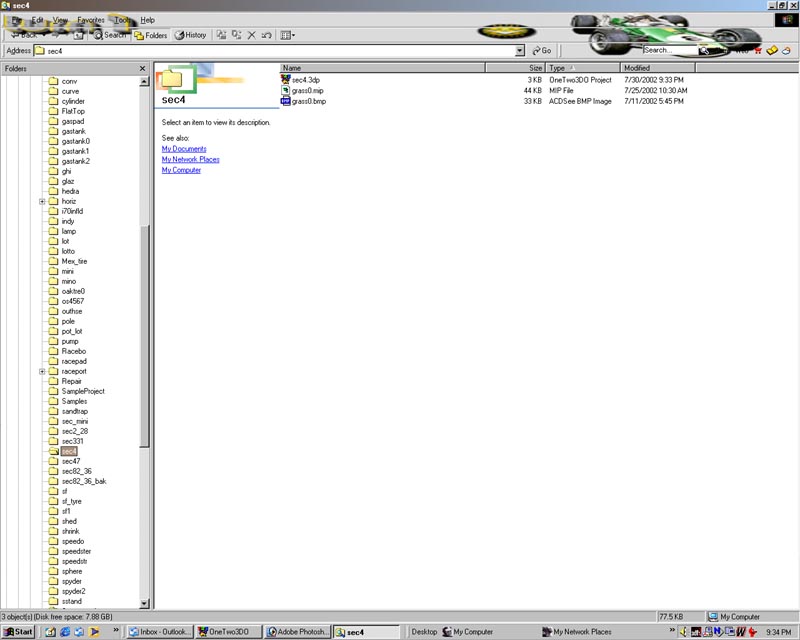
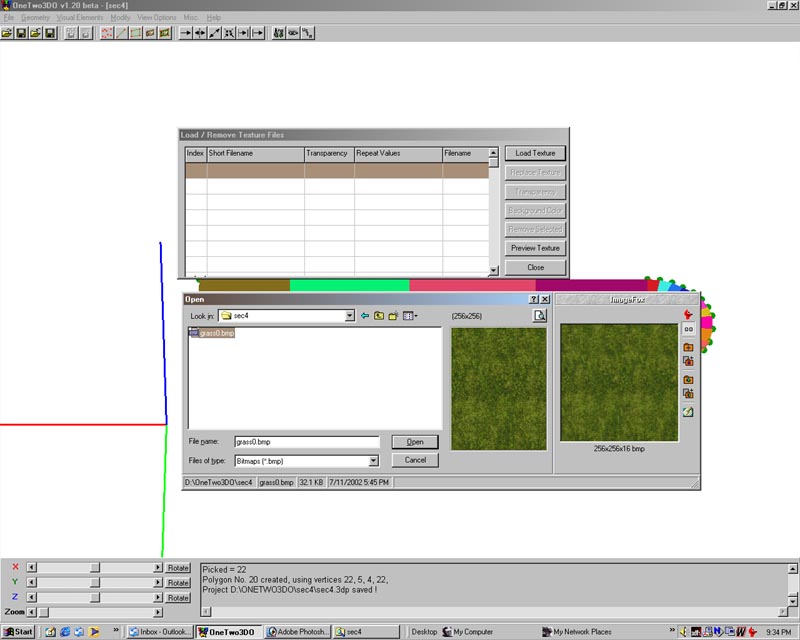
| 18. It is now time to save the project is you have not done so. This will create a new folder and it is here where the textures and 3do will reside. Now I go into the directory an find the texture file I want to use. This is both the *bmp and *.mip file. Copy these into the new folder. |
 |
| 19. Next we have to load this texture(s). |
 |
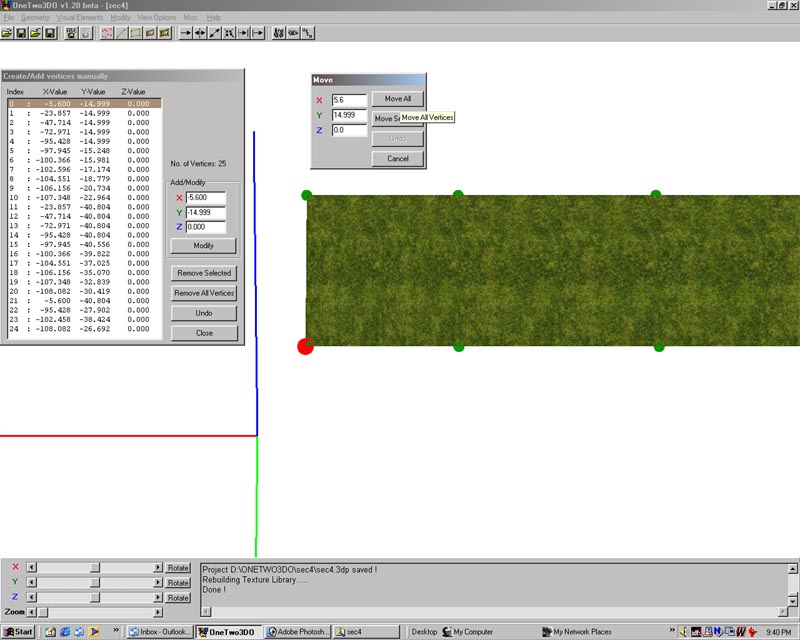
| 20. Now we assign the texture to EVERY polygon. If a polygon does not have a texture when you are finished the program will not write a 3do file for you. What I do next is position my future 3do. Remember that we got our points from the track. So first I want my origon to be at 0.0 this is done be moving the WHOLE section not one point. |
 |
| 21. The next step is to make a small offset. I generally use something like 0.100 though this can vary depending on the size of the 3do.Why? To avoid clipping, if the new section touchs or overlaps another section things get ugly sooner or later. Next I shrink my 3do slightly, here I use 0.995 on both the x axis and the y axis. I will leave it up to you to figure out why I do not do this to the z axis. |
 |
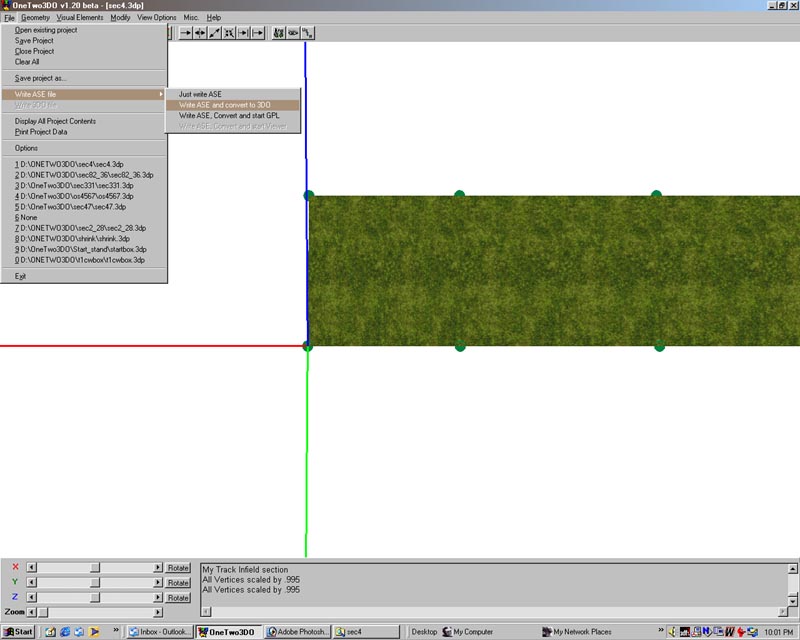
| 22. One thing you might have noticed was that the curved section looked different form the square sections. This can be fixed by changing textures that is having one texture for straight sections and another for curves just like in track building. Now its time to build the 3do file, painless and easy. |
 |